Beginner
Ergonomic Keyboard Selection Guide
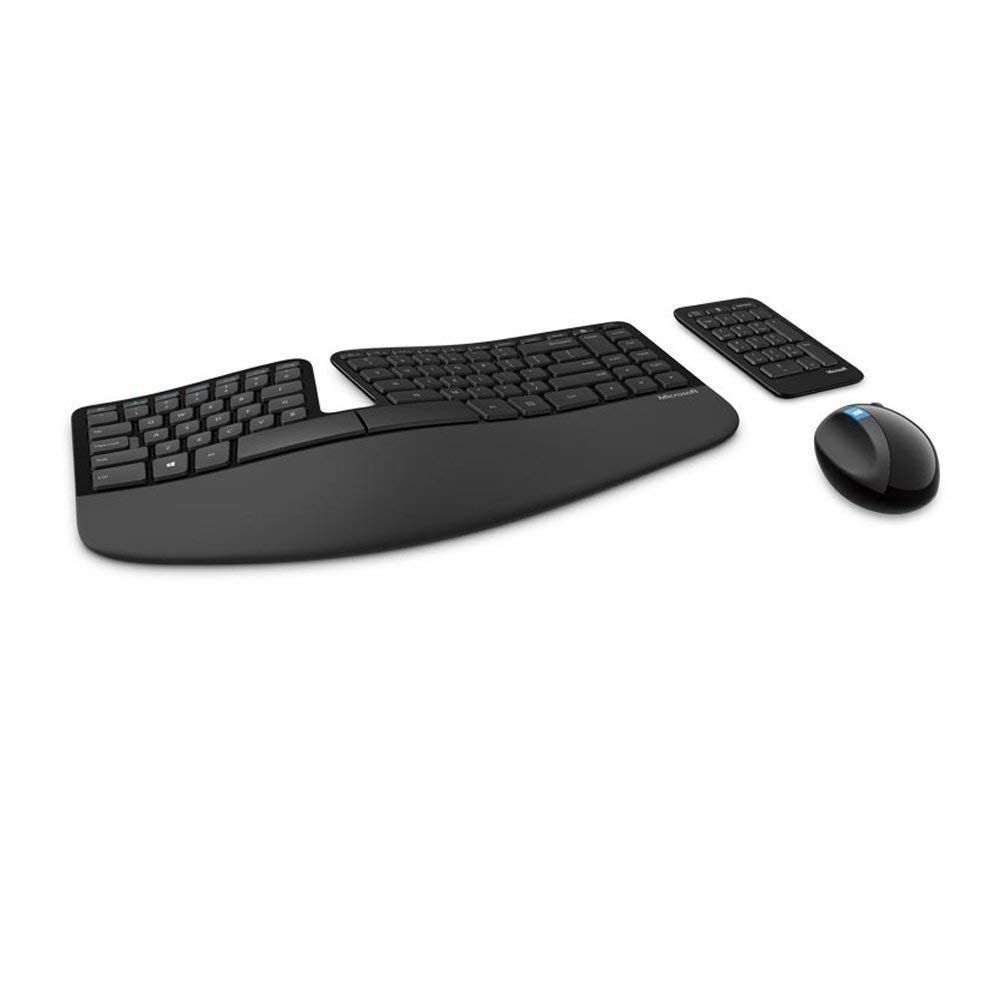
The right ergonomic keyboard reduces wrist extension, forearm rotation, and shoulder tension.
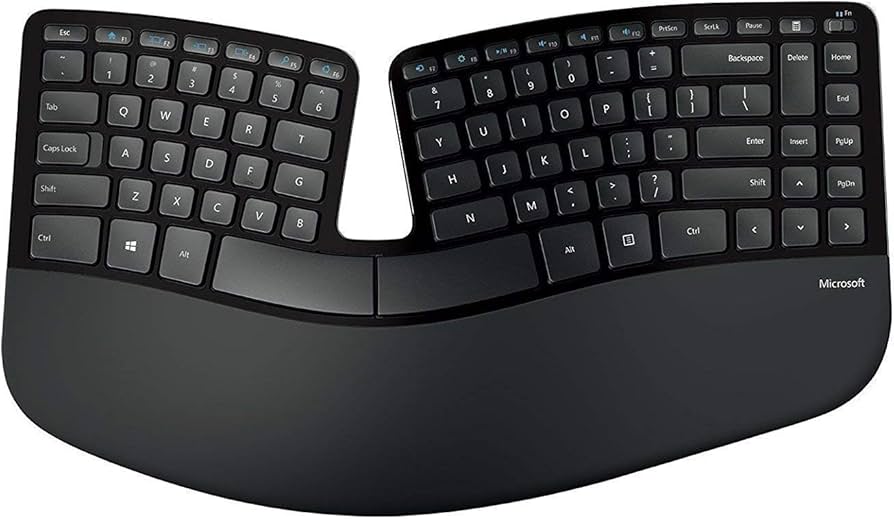
Split keyboards separate the key layout to allow natural hand positioning, while contoured
designs follow the natural curve of your hands. Look for negative tilt options that
position the keyboard front edge lower than the back.
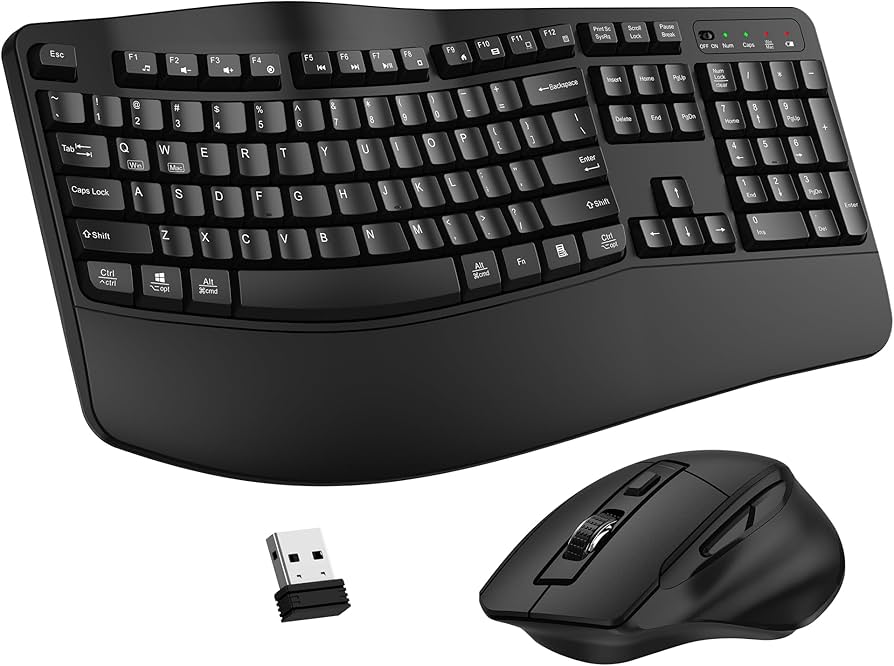
Consider your typing style and comfort preferences. Some users prefer gentle splits,
while others benefit from more dramatic separation. Test different designs when possible,
as personal comfort varies significantly. Wireless options reduce desk clutter but require
battery management.

Beginner
Optimal Keyboard Positioning
Position your keyboard so elbows remain at 90 degrees with forearms parallel to the floor.
The keyboard should be close enough that you don't reach forward, but far enough to
maintain neutral wrist position. A slight negative tilt (front edge lower than back)
promotes more natural wrist alignment.
Avoid having wrists bent up, down, or to either side while typing. If your desk is too
high, raise your chair or use a keyboard tray to achieve proper arm positioning.
Keyboard feet should be folded down to maintain the negative tilt that prevents
wrist extension.
Advanced
Typing Angle Optimization
Proper typing angle keeps wrists in a neutral position throughout key presses. The
ideal keyboard tilt varies by individual, but most users benefit from 5-15 degrees
negative slope. This angle reduces the ulnar deviation (side bending) that contributes
to carpal tunnel syndrome and wrist discomfort.
Adjust keyboard angle by folding or unfolding feet, using a keyboard tray with tilt
adjustment, or placing the keyboard on a slightly inclined surface. Some ergonomic
keyboards offer continuous tilt adjustment rather than fixed steps, allowing fine-tuning
for your specific comfort preferences.
Quick Fix
Quick Keyboard Height Check
Perform this 30-second assessment to verify optimal keyboard positioning. Sit with
arms at your sides, elbows at 90 degrees. Your forearms should be parallel to the
floor when hands are positioned over the keyboard. If elbows angle up or down,
adjust chair height or keyboard position.
Check wrist position by resting hands lightly on the keyboard. Wrists should remain
straight without bending up or down. If you notice tension in shoulders or forearms,
the keyboard is likely positioned incorrectly. Make micro-adjustments until you
feel completely relaxed.
Beginner
Ergonomic Mouse Fundamentals
An ergonomic mouse fits comfortably in your hand with buttons easily accessible without
finger stretching. Vertical mice reduce wrist rotation, while traditional mice with
proper positioning offer good comfort for most users. The mouse should be large enough
to support your entire hand without causing grip tension.
Consider your primary clicking finger - right-handed users typically benefit from
right-side buttons on vertical mice, while left-handed users need symmetrical designs
or left-specific models. Trackball mice eliminate arm movement entirely, beneficial
for users with limited space or shoulder issues.
Advanced
Mouse Reach Zone Optimization
Position your mouse within your primary reach zone to minimize shoulder and arm movement.
The ideal location places the mouse close to your keyboard, allowing natural hand
transition without extending arms or rotating shoulders. This positioning reduces
cumulative strain from frequent navigation.
Monitor mouse placement as part of overall desk arrangement. The mouse should require
minimal reaching while allowing full arm support on desk or armrest surfaces. If you
find yourself extending your arm or rotating your wrist to reach the mouse, adjust
positioning until movement feels natural and effortless.
Quick Fix
RSI Prevention Strategies
Repetitive Strain Injury (RSI) prevention starts with regular position changes and
hand exercises. Take micro-breaks every 20 minutes to shake out hands and stretch
fingers. Alternate between different hand positions throughout the day, and avoid
sustained gripping or clicking motions.
Strengthen hands and forearms with simple exercises: finger spreads, wrist circles,
and gentle resistance training. Maintain good overall posture, as shoulder and neck
tension contributes to hand and wrist problems. If you experience persistent pain,
consult a healthcare provider before adjusting your setup.
Advanced
Advanced Input Techniques
Master keyboard shortcuts to reduce mouse dependency and minimize repetitive clicking
motions. Learn touch typing if you haven't already - proper finger placement reduces
hand movement and increases typing speed. Consider voice-to-text software for extended
writing tasks to give your hands a complete rest.
Explore alternative input methods like trackballs, touchpads, or pen tablets depending
on your work requirements. Some users benefit from multiple input devices for different
tasks, allowing hand and wrist variation throughout the day. Customizable buttons on
advanced mice can reduce repetitive motions for specific workflows.
Beginner
Wrist Support & Resting Positions
Wrist rests should support your palms during breaks, not during active typing. Choose
soft, contoured wrist rests that match your keyboard height. Position them so you can
rest palms during pauses without extending wrists or changing typing posture.
Avoid rigid wrist rests that force your hands into fixed positions. The best support
comes from proper arm and keyboard positioning rather than external devices. If you
find yourself resting wrists constantly, adjust your setup to promote more natural
hand positioning that doesn't require artificial support.